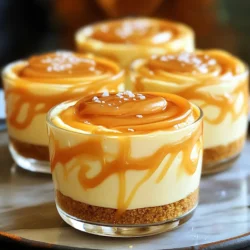
Are you ready for a dessert that feels like a treat but is easy to make? Salted caramel cheesecake cups are the perfect blend of creamy and sweet with a hint of salt. In this post, I’ll guide you through simple steps to create these delightful cups. Whether you’re a baking pro or a newbie, you’ll impress everyone with this easy recipe. Let’s dive in and create something delicious!
Ingredients
Key Ingredients for Salted Caramel Cheesecake Cups
To make these delightful cheesecake cups, you need:
– 1 cup graham cracker crumbs
– 4 tablespoons unsalted butter, melted
– 16 oz cream cheese, softened
– 1/2 cup granulated sugar
– 1 teaspoon vanilla extract
– 1 cup heavy whipping cream
– 1/4 cup salted caramel sauce (plus extra for drizzling)
– A pinch of sea salt
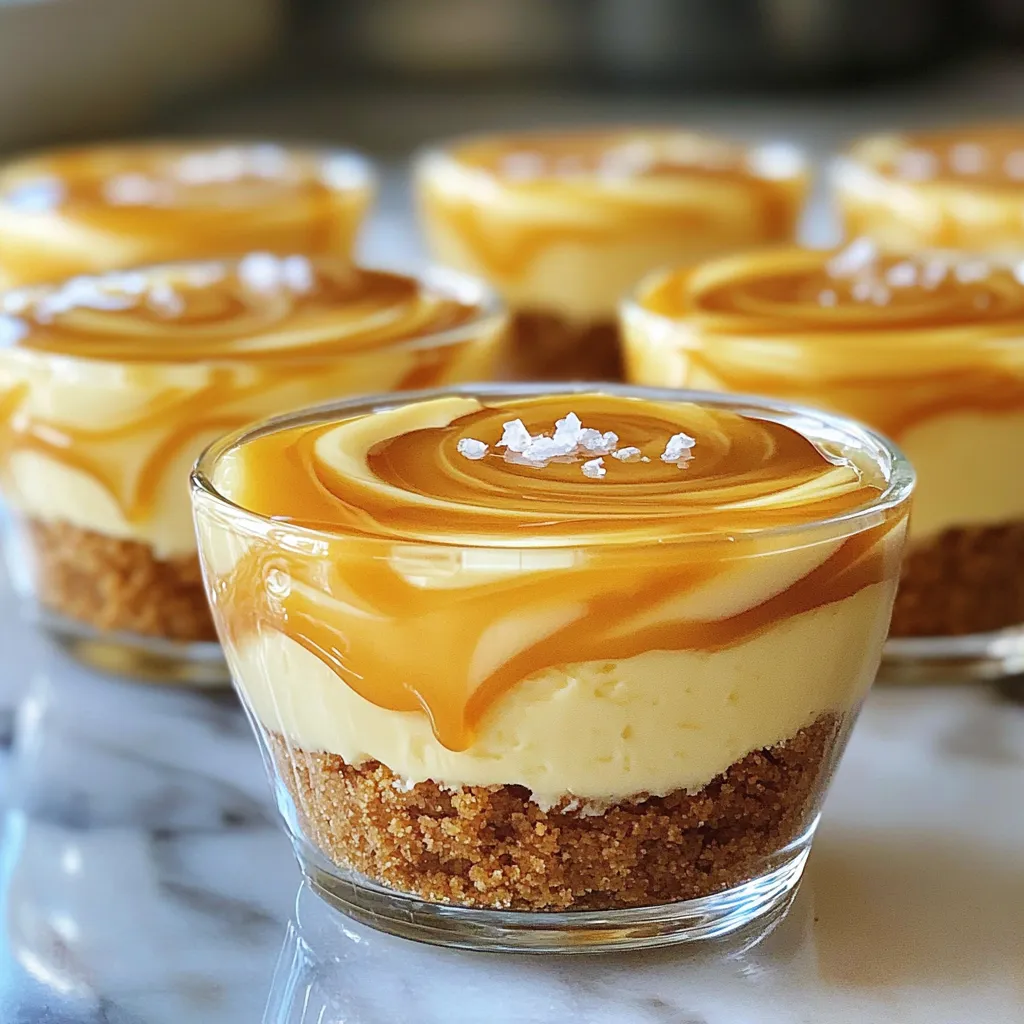
These ingredients create a rich and creamy dessert. The graham cracker crumbs form a sweet crust. The cream cheese and whipped cream blend together for a smooth filling. The salted caramel adds that perfect touch of sweetness and salt.
Optional Ingredients to Elevate the Recipe
You can add some optional ingredients to make your cheesecake cups even better:
– Whipped cream for topping
This whipped cream adds a light, fluffy layer on top. It makes the dessert feel more special and indulgent. You can also sprinkle some flaky sea salt on top for a gourmet touch.
Ingredient Substitutions and Recommendations
If you need to swap out some ingredients, here are a few ideas:
– Use gluten-free graham crackers for a gluten-free crust.
– Low-fat cream cheese works well if you want a lighter option.
– You can use homemade salted caramel sauce for a fresh taste.
These substitutions help you customize the recipe to fit your needs. Always remember to taste as you go to find the best balance of flavors.
Step-by-Step Instructions
Preparing the Graham Cracker Crust
First, grab a medium bowl. Add 1 cup of graham cracker crumbs and 4 tablespoons of melted unsalted butter. Mix them well. You want the crumbs to be coated nicely. Next, take your serving cups or small jars. Divide the crust mixture evenly into each cup. Use the back of a spoon to press it down firmly. This makes a solid base. Set the cups aside for later.
Making the Creamy Cheesecake Filling
Now, get a large mixing bowl. Beat 16 ounces of softened cream cheese with 1/2 cup of granulated sugar and 1 teaspoon of vanilla extract. Mix until it’s smooth and creamy. Check for lumps; none should be there. In a separate bowl, whip 1 cup of heavy cream until stiff peaks form. This makes it light and fluffy. Gently fold the whipped cream into the cream cheese mixture. Be careful not to deflate the whipped cream. Then, stir in 1/4 cup of salted caramel sauce and a pinch of sea salt. This adds a nice flavor boost.
Assembling and Chilling the Cheesecake Cups
Next, take the cheesecake mixture and spoon it over the graham cracker crusts. Fill each cup about ¾ full. This leaves room for toppings. Place the cups in the refrigerator. Chill them for at least 4 hours, or until set. This helps the flavors meld. Before serving, drizzle some extra salted caramel sauce on top of each cup. If you like, add whipped cream for a treat. Enjoy your delightful dessert!
Tips & Tricks
Perfecting the Whipped Cream Texture
To get that perfect whipped cream, start with cold cream. Cold cream whips better and faster. Whip until you see stiff peaks. This means the cream holds its shape. Then, fold it gently into the cheesecake mix. Be careful not to stir too hard. You want to keep that light and airy texture. This will make your cheesecake cups creamy and fluffy.
Achieving the Right Balance of Sweetness and Saltiness
Salted caramel is all about balance. You need both sweet and salty flavors. When mixing in the salted caramel sauce, taste as you go. Start with a little, then add more if needed. The pinch of sea salt adds depth. It enhances the sweet caramel flavor. Just make sure not to over-salt. A perfect mix will leave you craving more.
Presentation Tips for Stunning Dessert Cups
Make your dessert cups shine with simple touches. After chilling, drizzle extra salted caramel on top. This adds a glossy finish. For a fancy touch, sprinkle flaky sea salt on top. Use a dollop of whipped cream for height. You can even add a small piece of caramel candy as a garnish. These little details will wow your guests and make your dessert look gourmet.
Variations
Different Flavors of Cheesecake Cups
You can change the flavor of your cheesecake cups easily. Try adding fruit purees. Strawberry, blueberry, or raspberry work great. Just mix 1/2 cup of fruit puree into the cream cheese mixture. You can also swap out the salted caramel for chocolate sauce. Melted chocolate mixed in will create a rich flavor. For a citrus twist, add lemon or lime zest to the cream cheese. This gives a bright and fresh taste.
Gluten-Free Alternatives for the Crust
If you want a gluten-free option, use almond flour or gluten-free cookies. Simply replace the graham cracker crumbs with 1 cup of almond flour. Mix it with 4 tablespoons of melted butter. This will give you a tasty and crunchy crust. Another option is to use gluten-free digestive biscuits. Crush them and follow the same steps as the original crust.
Seasonal Variations for Festive Occasions
You can make your cheesecake cups special for holidays. In the fall, add pumpkin puree and spices like cinnamon and nutmeg. This gives a cozy taste perfect for autumn. During the winter, try peppermint extract in the cream cheese. Top with crushed candy canes for a festive look. In spring, mix in fresh lemon juice and zest. This makes a light, refreshing dessert for warm weather. Each season brings new flavors to enjoy!
Storage Info
How to Properly Store Cheesecake Cups
To keep your salted caramel cheesecake cups fresh, store them in the fridge. Use an airtight container or cover the cups tightly with plastic wrap. This keeps moisture in and prevents the cheesecake from absorbing odors. Make sure to chill them right after they set. Enjoy them cold for the best taste.
Freezing Tips and Thawing Instructions
You can freeze these cheesecake cups if you want to save some for later. First, let them chill completely in the fridge. Then, place them in a freezer-safe container. Make sure they are well covered to avoid freezer burn. To thaw, move them to the fridge the night before you eat them. This helps them regain their creamy texture.
Shelf Life and Best Practices for Freshness
When stored properly, cheesecake cups last about five days in the fridge. For the best taste, eat them within this time frame. If frozen, they can last up to three months. Just remember to check for any signs of spoilage before enjoying them. Keeping an eye on freshness helps you savor every bite.
FAQs
Can I use low-fat cream cheese for this recipe?
Yes, you can use low-fat cream cheese. It will still taste great. The texture might be a bit different. Your cheesecake cups may be less rich but still creamy.
How long do salted caramel cheesecake cups last in the fridge?
These cheesecake cups last up to five days in the fridge. Store them in an airtight container. Keep them away from strong odors to maintain their flavor.
What are the best toppings for cheesecake cups?
The best toppings include whipped cream and extra salted caramel. You can also use chocolate shavings or fresh fruit. A sprinkle of sea salt adds a nice touch too.
Can I make this recipe ahead of time?
Yes, you can make these cups a day or two ahead. They chill well in the fridge. Just add any toppings right before serving for freshness.
Where can I find the best salted caramel sauce?
You can find great salted caramel sauce at local grocery stores. Look for brands that focus on quality ingredients. You can also make your own at home for a personal touch.
In this post, we explored making salted caramel cheesecake cups. We covered key ingredients, including optional items that boost flavor. The step-by-step instructions made the process clear and easy. I shared tips to improve whipped cream and balance sweetness. You can even try different flavors or make gluten-free versions. Remember to store your cups properly to keep them fresh. Enjoy creating these simple desserts, and have fun experimenting with variations! Your kitchen will smell amazing, and your taste buds will thank you.