If you’re craving a sweet treat that screams fall, look no further! In this post, I’ll show you how to whip up Caramel Apple Mini Cheesecakes. These delightful bites blend creamy, rich cheesecake with juicy apples and a drizzle of caramel. Perfect for any festive gathering, these mini indulgences are easy to make and will impress everyone. Let’s dive into the easy steps and tasty tips to create your own delicious batch!
Ingredients
List of Ingredients
To make Caramel Apple Mini Cheesecakes, gather these key items:
– 1 cup graham cracker crumbs
– 1/4 cup unsalted butter, melted
– 2 tablespoons sugar
– 8 oz cream cheese, softened
– 1/2 cup powdered sugar
– 1 teaspoon vanilla extract
– 1 large egg
– 1/2 cup apples, peeled and finely chopped
– 1 teaspoon cinnamon
– 1/2 cup caramel sauce (store-bought or homemade)
– Whipped cream for topping
– Extra apple slices and caramel sauce for garnish
Optional Ingredients for Variation
You can play with flavors and textures! Here are some ideas:
– Add a pinch of nutmeg for extra warmth.
– Use crushed cookies instead of graham crackers for the crust.
– Swap apples for pears or peaches for a fruity twist.
– Try a swirl of chocolate or peanut butter in the filling.
Equipment Needed
To create these mini delights, you will need:
– Muffin tin
– Mini cupcake liners
– Mixing bowls
– Electric mixer or whisk
– Measuring cups and spoons
– Rubber spatula
– Wire rack for cooling
With these ingredients and tools, you’re ready to create a festive treat that bursts with flavor!
Step-by-Step Instructions
Preparation and Preheating
First, set your oven to 325°F (160°C). This step warms the oven for baking. While the oven heats, line a muffin tin with mini cupcake liners. This makes it easy to lift out the mini cheesecakes later.
Making the Graham Cracker Crust
In a medium bowl, mix the graham cracker crumbs, melted butter, and sugar. Stir until the crumbs are well coated. This mixture forms a tasty crust. Press about a tablespoon of the crumb mix into each cupcake liner. Make sure you pack it down firmly. Bake the crusts for 5 minutes. This short bake helps set the crust. Once done, take the pan out of the oven and let it cool.
Preparing the Cream Cheese Filling
In a clean mixing bowl, beat the softened cream cheese until it’s creamy. This step is key for a smooth filling. Gradually add the powdered sugar while mixing. Keep mixing until it’s smooth and fluffy. Next, add the vanilla extract, then the egg. Mix just until combined. Be careful not to overmix, as this can change the texture. Now, gently fold in the chopped apples and cinnamon. This adds a lovely flavor to your filling.
Baking Instructions
Pour the cream cheese mixture over the cooled crusts in the muffin tin. Fill each liner about 3/4 full. This allows room for the cheesecake to rise. Bake for 15-20 minutes. You want the centers to be just set and slightly jiggly. After baking, let them cool in the pan for about 10 minutes. Then, transfer them to a wire rack to cool completely.
Cooling and Serving Tips
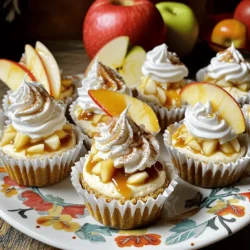
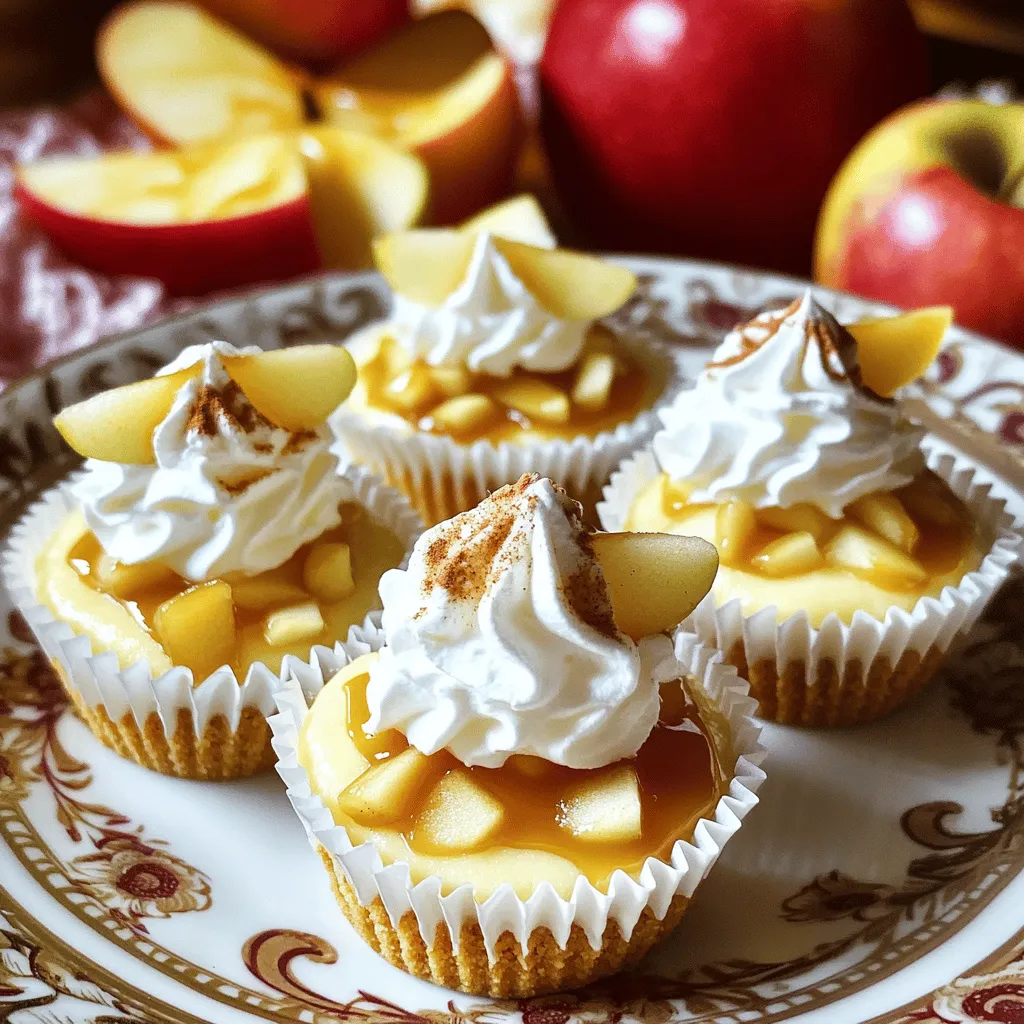
Once the mini cheesecakes are cool, drizzle caramel sauce on top. Refrigerate them for at least 2 hours. Serving them cold enhances the flavors. When ready to serve, add whipped cream, a sprinkle of cinnamon, and extra apple slices for a beautiful touch. Arrange them on a decorative plate for a festive look.
Tips & Tricks
Tips for Perfect Mini Cheesecakes
To make the best mini cheesecakes, follow these tips:
– Use room temperature cream cheese for a smooth batter. Cold cream cheese can make lumps.
– Don’t overmix the batter after adding the egg. This keeps the cheesecakes light.
– Fill each liner to 3/4 full for the perfect rise. They need space to puff up.
– Cool them slowly in the pan before transferring to a wire rack. This helps prevent cracks.
Common Mistakes to Avoid
Watch out for these common mistakes:
– Skipping the crust prep can lead to soggy bases. Make sure to press the crumbs firmly.
– Overbaking can dry them out. Check them at 15 minutes; they should jiggle slightly.
– Not chilling long enough makes them too soft to serve. Aim for at least 2 hours in the fridge.
– Using too much caramel can overwhelm the flavors. A light drizzle is perfect.
Serving Suggestions and Presentation Tips
Presentation makes a big impact. Here are some ideas:
– Use a decorative plate to show off your mini cheesecakes.
– Drizzle extra caramel sauce around the plate for a sweet touch.
– Garnish with thin apple slices for color and freshness.
– Top with whipped cream and a sprinkle of cinnamon for a festive look.
Variations
Flavor Variations
You can change the flavor of these mini cheesecakes easily. For a pumpkin twist, add 1/2 cup of pumpkin puree instead of apples. Mix in 1 teaspoon of pumpkin pie spice for warmth. If you crave chocolate, use chocolate cream cheese. You can also fold in mini chocolate chips for extra delight. These swaps keep the base the same but add new tastes.
Dietary Adjustments
Do you need gluten-free options? You can use gluten-free graham cracker crumbs. Look for brands that are certified gluten-free. This way, everyone can enjoy a treat. If you want a dairy-free version, try vegan cream cheese. Substitute with almond or coconut milk as needed. These options make it easier for those with dietary needs.
Topping Ideas
Toppings can really make these mini cheesecakes shine. Try adding chopped nuts for a nice crunch. Pecans or walnuts work great. You can drizzle more caramel sauce on top for extra sweetness. If you like, add a sprinkle of sea salt to balance the flavors. Fresh apple slices or whipped cream make perfect garnishes too. These simple ideas can turn your mini cheesecakes into a showstopper.
Storage Info
Proper Storage Techniques
To keep your caramel apple mini cheesecakes fresh, store them in the fridge. Use an airtight container to prevent drying out. If you stack them, place parchment paper between layers. This keeps the whipped cream from sticking.
Freezing Instructions
You can freeze these mini cheesecakes too! Wrap each cheesecake in plastic wrap tightly. Then, place them in a freezer-safe bag. They will stay fresh for up to three months. When you want to enjoy them, thaw them in the fridge overnight.
How Long They Last in the Fridge
In the fridge, these mini cheesecakes last about one week. If you want the best taste, eat them within three to five days. Always check for any signs of spoilage before serving.
FAQs
Can I use low-fat cream cheese?
Yes, you can use low-fat cream cheese in this recipe. It will change the taste and texture a bit. The mini cheesecakes may be less rich but still tasty. Just make sure it is softened for easy mixing.
How do I know when they are done baking?
You can tell they are done when the centers are slightly jiggly. They should not look wet or shiny. A toothpick inserted should come out clean or with just a few crumbs. If you overbake, they will be dry.
Can I make these mini cheesecakes ahead of time?
Absolutely! You can make them a day or two before serving. Just store them in the fridge after they cool. This way, they will set nicely and be ready when you are.
What can I substitute for apples?
If you don’t have apples, try using pears or even mashed bananas. They will give a different flavor but can work well. You can also add berries or chocolate chips for a fun twist.
Do I need to use cupcake liners?
Using cupcake liners helps with easy removal. They also keep the mini cheesecakes from sticking to the pan. If you don’t have liners, you can grease the pan well, but liners are best for this recipe.
In this blog post, we explored the art of making mini cheesecakes. We covered key ingredients, equipment, and step-by-step instructions. I shared tips for perfecting your creation and ways to add unique flavors. We also discussed storage techniques to keep your treats fresh. With these insights, you can craft delightful mini cheesecakes with ease. Remember, practice makes perfect. Enjoy your baking journey!