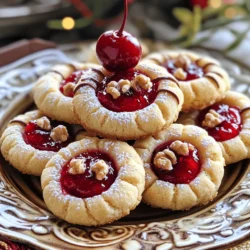
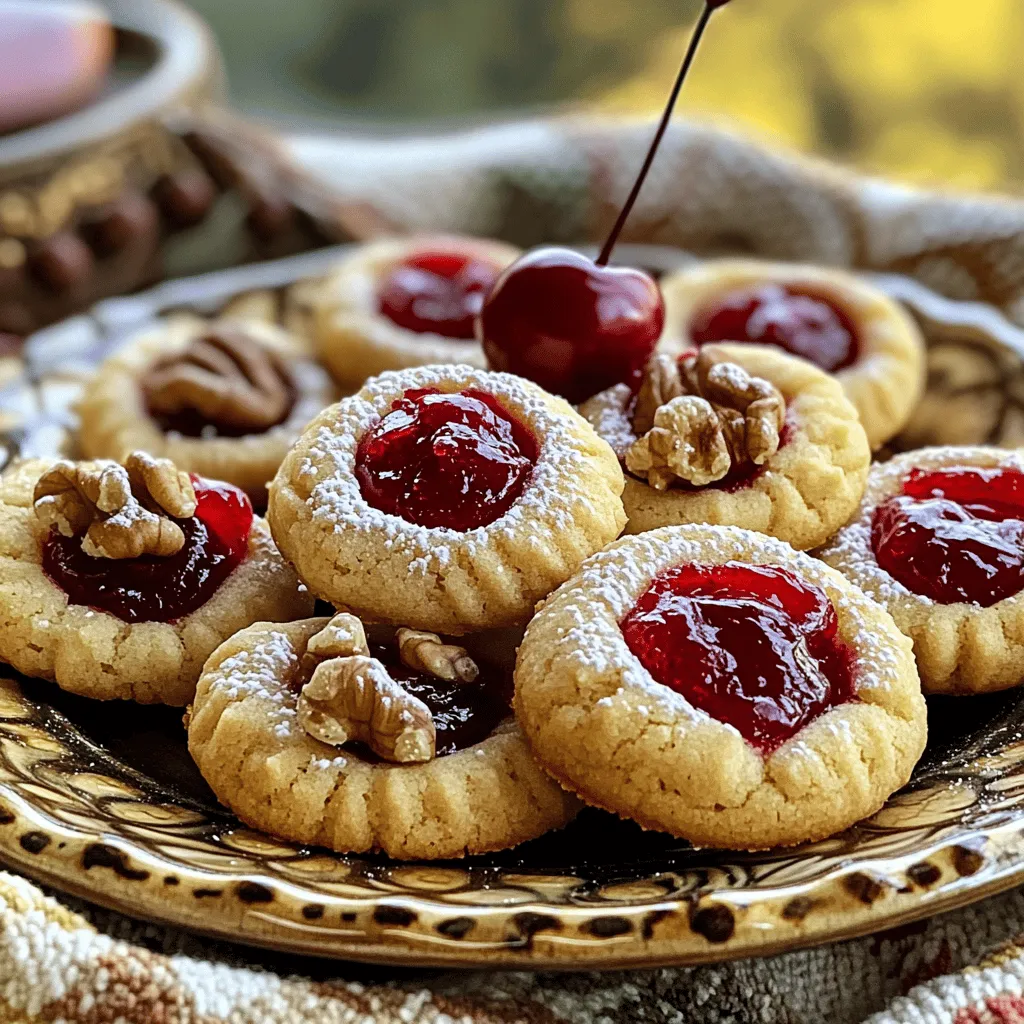
If you love cherry pie, you’ll adore these Cherry Pie Thumbprint Cookies! With a crispy edge and a gooey cherry center, they are the perfect treat for any occasion. I’ll guide you through easy steps, share helpful tips, and show you tasty variations. Get ready to impress your friends and family with this simple yet delightful recipe! Let’s dive into the sweet world of these cookies!
Ingredients
Key Ingredients for Cherry Pie Thumbprint Cookies
To make Cherry Pie Thumbprint Cookies, you need some key ingredients. Here’s what you’ll need:
– 1 cup unsalted butter, softened
– 1 cup granulated sugar
– 1 large egg
– 2 teaspoons vanilla extract
– 2 ½ cups all-purpose flour
– ½ teaspoon baking powder
– ¼ teaspoon salt
– 1 cup cherry jam (or preserves)
– ½ cup chopped walnuts or almonds (optional)
– Powdered sugar for dusting
These ingredients come together to make a rich and sweet cookie with a delightful cherry center.
Optional Add-ins and Substitutions
You can customize your cookies with some fun add-ins. If you like nuts, try adding walnuts or almonds for crunch. You can also swap the cherry jam for other flavors like raspberry or apricot. This change can give you a new twist on the classic recipe. If you need a dairy-free option, use vegan butter.
Measuring Tips for Baking Success
Measuring your ingredients correctly is key to great cookies. Here are some tips:
– Use dry measuring cups for flour and sugar.
– Level off the top with a straight edge for accuracy.
– For sticky items like jam, use a spoon to scoop it out easily.
– Make sure your butter is softened but not melted for the best texture.
By following these tips, you’ll set yourself up for success in baking these tasty treats!
Step-by-Step Instructions
Detailed Baking Process
To make Cherry Pie Thumbprint Cookies, start by gathering your ingredients. You need butter, sugar, egg, vanilla, flour, baking powder, salt, and cherry jam. If you like, add chopped nuts for crunch.
1. Preheat your oven to 350°F (175°C). Line a baking sheet with parchment paper to prevent sticking.
2. In a bowl, cream the softened butter and granulated sugar. Mix until it is light and fluffy.
3. Add the large egg and vanilla extract. Beat until everything is mixed well.
4. In another bowl, whisk together the flour, baking powder, and salt. Slowly add this to the wet mix. Stir until a soft dough forms.
5. If using nuts, fold them into the dough carefully.
6. Scoop tablespoon-sized dough portions. Roll them into balls and place them on the baking sheet. Space them about 2 inches apart.
7. Make an indentation in the center of each ball using your thumb or a teaspoon.
8. Spoon cherry jam into each indentation, but don’t let it overflow.
9. Bake for 12-15 minutes. Look for lightly golden edges as a sign they are ready.
10. Let the cookies cool on the baking sheet for a few minutes. Then, move them to a wire rack to cool completely.
11. Once cool, dust them lightly with powdered sugar for a sweet finish.
Common Mistakes to Avoid
When making these cookies, some errors can happen. Here are a few to watch out for:
– Overmixing the dough can make the cookies tough. Mix just until combined.
– Skipping the cooling time can lead to broken cookies. Give them a few minutes on the sheet.
– Filling the indent too much can cause the jam to overflow. Use just enough to fill it nicely.
Importance of Cooling Time
Cooling time is key for great cookies. When you let them cool, they set properly. If you rush this, they may fall apart. The cooling also helps the flavors blend better. Enjoying the cookies warm is nice, but letting them cool enhances the taste!
Tips & Tricks
How to Achieve the Perfect Cookie Texture
To get the best texture, use room temperature butter. This helps the butter mix well with sugar. Cream the two until they are light and fluffy. This process adds air, making your cookies soft. Do not overmix the dough after adding flour. Mix just until combined to keep them tender. Bake them until the edges turn light golden. This ensures a soft center.
Ingredient Swaps for Different Flavors
You can swap cherry jam for other jams. Try raspberry or strawberry for a twist. Use almond extract instead of vanilla for a nutty flavor. If you want a crunch, add chopped pecans or hazelnuts. This change brings new flavors while keeping the cookie base the same.
Enhancing the Cherry Flavor
To boost the cherry flavor, consider adding a splash of cherry juice. This adds moisture and a deeper taste. You can also mix in a bit of almond extract. Almond and cherry pair well together. For a fun twist, top the cookies with fresh cherries. This adds a burst of flavor and makes them look pretty.
Variations
Different Jam or Filling Options
You can change the jam in these cookies. Try raspberry or blueberry jam for a twist. Apricot jam also works well. Each filling gives a new taste. You can use store-bought jams or homemade ones. Experiment with flavors you love. This adds fun to your baking.
Nut-Free Version for Allergies
If you or someone you know has nut allergies, leave out the nuts. The cookies still taste great without them. You can replace the chopped nuts with oats. This keeps the cookies chewy and adds a nice texture. Always check labels to ensure no hidden nuts are in your ingredients.
Seasonal Variations Using Other Fruits
Use seasonal fruits for fresh flavors. In summer, try peach or strawberry jam. Fall brings apple butter, which will add a warm spice. In winter, cranberry sauce makes a tangy option. Each fruit gives a unique taste and color. It’s a great way to enjoy the seasons in your baking.
Storage Info
Best Ways to Store Cherry Pie Thumbprint Cookies
To keep your Cherry Pie Thumbprint Cookies fresh, store them in an airtight container. This keeps moisture out and helps them stay soft. You can stack them with parchment paper between layers to avoid sticking. Keep the container at room temperature for up to a week. If you want to keep them longer, consider freezing them.
Freezing Instructions for Longer Shelf Life
If you want to freeze your cookies, first let them cool completely. Then, place them in a single layer on a baking sheet. Freeze them for about an hour until solid. After that, transfer them to a freezer-safe bag or container. They can last up to three months in the freezer. Make sure to label the container with the date.
Reheating Tips for Freshness
When you’re ready to enjoy your cookies again, preheat your oven to 350°F (175°C). Place the cookies on a baking sheet and warm them for about 5-7 minutes. This helps restore their soft texture. You can also microwave a cookie for about 10-15 seconds for a quick warm-up. Just be careful not to overheat, or they may get tough.
FAQs
Can I make these cookies gluten-free?
Yes, you can make these cookies gluten-free. Use a gluten-free flour blend instead of all-purpose flour. Look for a blend that works well in baking. This choice gives you a tasty result without gluten.
What can I substitute for cherry jam?
You can use other fruit jams or preserves. Raspberry, strawberry, or apricot can work nicely. Each option adds a unique twist to the cookie flavor. Choose your favorite fruit for a fun change.
How long do these cookies last?
These cookies stay fresh for about one week at room temperature. Keep them in an airtight container to maintain their texture. If you want them to last longer, you can freeze them. They freeze well for up to three months.
Can I make the dough ahead of time?
Yes, you can make the dough in advance. Wrap it tightly in plastic wrap and chill it in the fridge. The dough can stay fresh for up to three days. Just bring it to room temperature before baking.
What’s the best way to serve Cherry Pie Thumbprint Cookies?
Serve these cookies on a decorative plate for a lovely touch. Dust them with powdered sugar for sweetness. You can also drizzle melted chocolate on top for extra flavor. A fresh cherry on each cookie adds a nice finish.
In this post, we covered how to make Cherry Pie Thumbprint Cookies. We discussed key ingredients, optional add-ins, and measuring tips. I shared a step-by-step baking process and highlighted common mistakes. You learned how to perfect the cookie texture and enhance the cherry flavor. We explored different filling options and storage methods.
Remember, baking is about enjoying the process and experimenting. Happy baking!