Ready to indulge in a treat that’s perfect for any gathering? Cheesy Garlic Pull Apart Bread is a delight that you won’t want to miss. Loaded with gooey cheese and fragrant garlic, this dish will have everyone reaching for more. In this guide, I’ll share all the tips and tricks to make it perfect every time. Let’s dive into the delicious world of cheesy goodness!
Ingredients
Main Ingredients
For the best cheesy garlic pull apart bread, you need:
– 1 large round loaf of sourdough bread
– 1/2 cup unsalted butter, melted
– 4 cloves garlic, minced
– 1 cup shredded mozzarella cheese
– 1/2 cup grated Parmesan cheese
These main ingredients form the heart of your dish. Sourdough bread gives a lovely texture. The melted butter adds richness. Garlic infuses flavor, while the cheeses provide that gooey stretch we all love.
Seasonings and Garnishes
To enhance your bread, gather these:
– 1 tablespoon fresh parsley, chopped
– 1 teaspoon garlic powder
– Salt and pepper to taste
Fresh parsley adds color and a bright flavor. Garlic powder boosts the garlic taste. Don’t forget salt and pepper. They help balance the dish and make all the flavors pop.
Additional Tools Needed
You will also need some tools for easy cooking:
– Aluminum foil
– Baking sheet
– Brush or spoon
The aluminum foil helps trap heat during baking. A baking sheet catches any drips. A brush or spoon ensures you spread the garlic butter evenly.
Step-by-Step Instructions
Preparation Steps
1. Preheating the oven
Start by setting your oven to 350°F (175°C). This warm temperature helps the cheese melt perfectly.
2. Cutting the bread
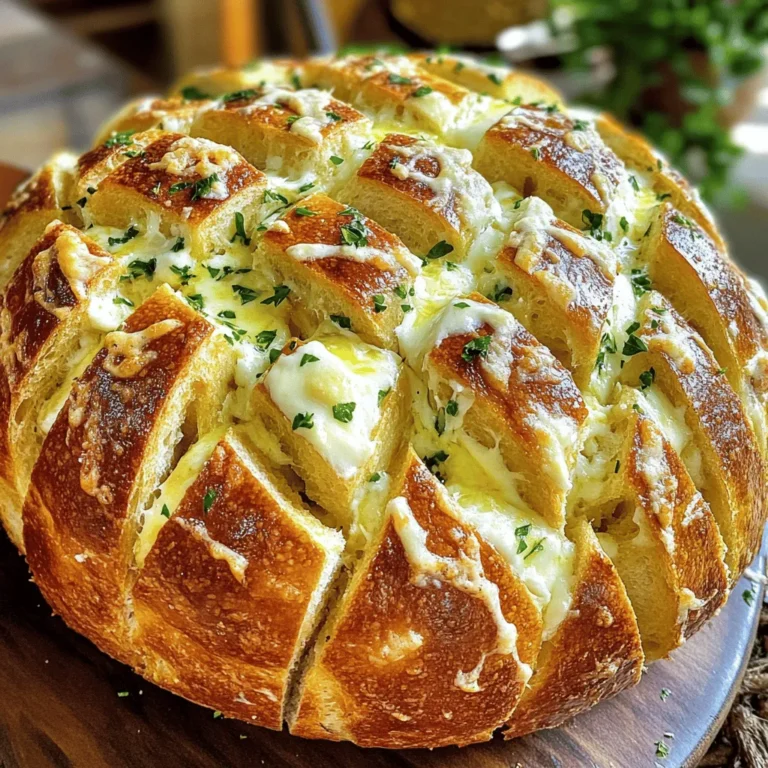
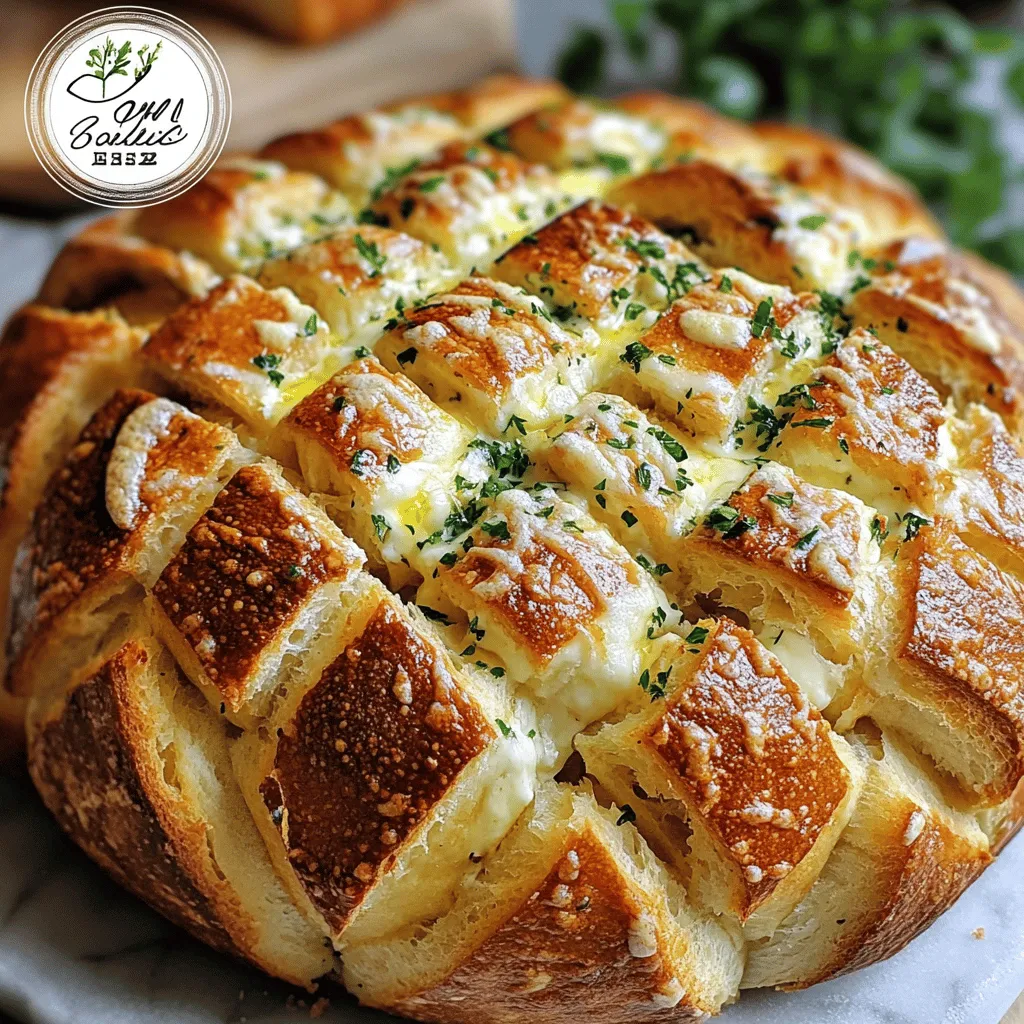
Take the large round sourdough loaf. Carefully cut it into a grid. Make cuts about 1 inch apart. Remember, do not cut all the way through. You want the base of the loaf to stay intact.
Combining Ingredients
1. Making the garlic butter mixture
In a small bowl, mix 1/2 cup melted unsalted butter with 4 minced garlic cloves. Add 1 teaspoon garlic powder, salt, and pepper to taste. Stir it well until combined.
2. Stuffing the bread with cheese
Grab a brush or spoon. Generously drizzle the garlic butter into the cuts of the bread. Make sure to get some deep into those cuts. Next, pack shredded mozzarella and grated Parmesan cheese into each cut. Press down gently to fit as much cheese as you can.
Baking the Bread
1. Wrapping in foil
Take a piece of aluminum foil. Wrap the bread loosely, making sure it is fully covered. Place it on a baking sheet to catch any drips.
2. Baking time and tips
Bake the bread in the preheated oven for 15-20 minutes. Check to see if the cheese is melted and bubbly. For a crispy top, remove the foil for the last 5 minutes of baking. When it’s done, let it cool slightly before serving. This delicious cheesy bread is now ready for you and your guests!
Tips & Tricks
Achieving the Best Texture
To get the best texture in your Cheesy Garlic Pull Apart Bread, start by cutting the bread. Use a sharp knife to make deep cuts in a grid pattern. Each cut should be about one inch apart. Make sure you don’t cut all the way through the bottom. This keeps the loaf together, which helps when pulling it apart later.
Next, ensure even cheese distribution. After cutting, stuff each slice with cheese. Use a mix of mozzarella and Parmesan for the best flavor. Press the cheese into the cuts firmly. This helps the cheese melt evenly and makes each bite cheesy and delicious.
Serving Suggestions
Pair your bread with tasty dips or sauces. A side of marinara sauce or garlic aioli works great. They add extra flavor and make the bread even more fun to eat.
For ideal accompaniments, consider a fresh salad or a bowl of soup. A light salad balances the richness of the cheesy bread. If you serve it with soup, a hearty tomato or creamy potato soup adds warmth and comfort.
Common Mistakes to Avoid
One big mistake is overbaking the bread. Keep an eye on it as it bakes. You want the cheese melted and bubbly, not burnt. Baking for about 15-20 minutes usually works well.
Another mistake is not using enough garlic butter. The garlic butter adds flavor and moisture. Be generous when drizzling it into the cuts of the bread. Don’t skip this step if you want that amazing garlic taste with each bite.
Variations
Cheese Variations
You can switch up the cheese for a new taste. Try sharp cheddar for a bold flavor. Or use gouda for a smoky twist. If you want creaminess, add cream cheese. It melts well and makes the bread rich and soft. Mixing different cheeses can also create a fun flavor blend.
Ingredient Swaps
If you need a gluten-free option, use gluten-free bread. It works just as well. You can also switch herbs for new tastes. Try thyme or oregano instead of parsley. These herbs add nice flavors and make it unique. Don’t be afraid to experiment!
Flavor Enhancements
Want to take your bread to the next level? Add sun-dried tomatoes or olives for extra taste. They bring a bit of tang and sweetness. You can also mix in spices like paprika or chili flakes. These add warmth and kick to each bite. The combinations are endless!
Storage Info
Proper Storage Techniques
To keep your cheesy garlic pull apart bread fresh, store leftovers in an airtight container. This helps prevent the bread from drying out. If you don’t have a container, wrap the bread tightly in plastic wrap or aluminum foil. Make sure it is sealed well to lock in moisture.
Reheating Instructions
For the best results, reheat your bread in the oven. Preheat the oven to 350°F (175°C). Place the bread on a baking sheet and cover it loosely with aluminum foil. Heat for about 10-15 minutes until warm. If you’re in a hurry, you can use a microwave. Place a piece of bread on a microwave-safe plate and heat for about 15-20 seconds. Just remember, the microwave may make the bread a bit chewy.
Freezing Tips
You can freeze the bread before or after baking. If you freeze it before baking, wrap it well and store it in a freezer bag. When you’re ready to bake, let it thaw in the fridge overnight. Then, bake as usual. If you freeze it after baking, wait for the bread to cool completely before wrapping. Thaw it in the fridge, then reheat in the oven for the best taste. This way, you can enjoy cheesy garlic pull apart bread whenever you crave it!
FAQs
How to make Cheesy Garlic Pull Apart Bread from scratch?
To make Cheesy Garlic Pull Apart Bread from scratch, start with a large round loaf of sourdough bread. Cut it into a grid pattern, making sure not to cut all the way through. Mix melted butter, minced garlic, garlic powder, salt, and pepper in a bowl. Drizzle this garlic butter into the cuts of the bread. Next, stuff the bread with shredded mozzarella and grated Parmesan cheese. Wrap the bread in foil and bake at 350°F for 15-20 minutes. For a crispy top, remove the foil for the last 5 minutes.
Can I use different types of bread?
Yes, you can definitely use different types of bread. While sourdough is my favorite, you can try a round loaf of Italian or French bread. Any bread with a good crust will work well. Just make sure the bread is soft enough to pull apart easily. This gives you a fun and tasty way to enjoy the cheesy goodness!
How long does this bread stay fresh?
Cheesy Garlic Pull Apart Bread tastes best fresh out of the oven. However, if you have leftovers, they can stay fresh for about 2-3 days at room temperature. Store it in a paper bag to keep the crust crispy. If you want to keep it longer, you can wrap it tightly and freeze it for up to a month.
What can I serve with Cheesy Garlic Pull Apart Bread?
This bread pairs well with many dishes. You can serve it with marinara sauce for dipping. A fresh salad or a bowl of soup also makes a great side. For a fun twist, consider serving it with a creamy spinach dip. Each bite of cheesy bread will be even better with a tasty dip!
In this blog post, we explored how to make Cheesy Garlic Pull Apart Bread. We covered key ingredients, step-by-step instructions, and helpful tips. You learned about ingredient swaps and storage techniques.
Making this bread is simple and fun. With these tips, you can impress anyone. Don’t hesitate to mix flavors and try new things. Enjoy your delicious creation with friends or family. Happy baking!

