![To make Berry Coconut Popsicles, you need some fresh and simple ingredients. Here’s what you will need: - 1 cup mixed berries (strawberries, blueberries, raspberries) - 1 cup coconut milk (canned or carton, unsweetened) - 2 tablespoons honey or maple syrup - 1/2 teaspoon vanilla extract - 1/4 cup finely shredded coconut (unsweetened) - A pinch of sea salt These ingredients come together to create a refreshing treat. The berries add a fruity flavor, while the coconut milk gives it a creamy base. The honey or maple syrup sweetens the popsicles just right. You can also customize the sweetness to fit your taste. Using unsweetened coconut milk helps keep the flavors bright. The vanilla extract adds warmth, and the sea salt enhances all the tastes. Don't forget the shredded coconut! It adds a fun texture and makes each bite special. For the full recipe, you can follow the detailed steps ahead. Enjoy gathering these ingredients! First, gather your ingredients. In a blender, add the mixed berries and coconut milk. Blend them until the mix is smooth and creamy. Next, add honey or maple syrup for sweetness. Don't forget the vanilla extract! Blend again until well mixed. Now, it's time to taste the mixture. If it needs more sweetness, add a bit more honey or syrup. If you want some berry chunks, hold back a few berries. In a bowl, fold in the finely shredded coconut and any reserved berries for extra texture. Carefully pour the berry coconut mixture into your popsicle molds. Leave a little space at the top. This space lets the popsicles expand as they freeze. Insert the popsicle sticks. Tap the molds lightly on the counter to get rid of any air bubbles. Freeze the popsicles for at least 4 to 6 hours. They need to be completely solid to hold their shape. To take them out, run warm water over the outside of the molds for a few seconds. This trick helps the pops come out easily. Enjoy your refreshing treats! For the complete process, check the [Full Recipe]. To avoid ice crystals, blend your mixture well. A smooth blend keeps the popsicles creamy. If you notice ice crystals forming, try adding more coconut milk. This helps create a silkier texture. For better flavor combinations, mix different berries. Strawberries and blueberries pair nicely. You can also add a splash of lime juice for a fresh twist. Experiment and find your favorite blend! For the best molds, choose silicone ones. They make it easy to pop out the popsicles. Look for molds that hold at least 3 ounces. This size is perfect for snacking. For blending, I recommend a high-powered blender. It should easily mix fruits and coconut milk. A smooth mixture is key for creamy popsicles. If you have a personal blender, that works great too! {{image_2}} You can change the taste of your berry coconut popsicles easily. Adding pineapple gives a tropical twist. The sweet and tart flavor of pineapple pairs well with berries. You could blend in a cup of fresh pineapple chunks. Then, follow the instructions for a refreshing treat. Adding citrus like lime or lemon brings a zing. This brightens up the flavors and adds a fun kick. Just squeeze in some fresh juice or add zest. A little goes a long way, so start with a teaspoon. Adjust to your taste for a perfect balance. Making berry coconut popsicles fit your diet is simple. If you prefer vegan options, you can swap honey for maple syrup. Both sweeteners work well in this recipe. They add sweetness without losing flavor. For a low-sugar version, you can use stevia or monk fruit. These sweeteners offer a great taste with fewer calories. Adjust the amount to fit your liking. You can enjoy these treats without the extra sugar. Explore the [Full Recipe] to see how these changes fit in! Store your berry coconut popsicles in an airtight container. This keeps them fresh and tasty. Wrap each popsicle in plastic wrap for extra protection. Place them in the freezer at 0°F (-18°C) for best results. They can last up to two months in the freezer. To enjoy your popsicles, you need to thaw them a bit. The best way is to let them sit at room temperature for 5-10 minutes. You can also run warm water over the molds for a quick release. This method works great without melting them too much. Berry coconut popsicles are a fun and tasty treat. They have a creamy texture from coconut milk. The mix of berries adds a burst of sweet and tangy flavor. You can taste strawberries, blueberries, and raspberries in each bite. The shredded coconut gives a nice chewiness, making every lick a delight. These popsicles are perfect on hot days or for a quick snack. Berry coconut popsicles can last up to two months in the freezer. They stay tasty and creamy if you keep them sealed well. Use an airtight container or wrap them tightly. After two months, they may lose some flavor or texture. Always check for ice crystals before enjoying them. Yes, you can use frozen berries for these popsicles. They make a great option if fresh berries aren't available. Just be sure to let them thaw a bit before blending. This helps achieve a smooth texture. Frozen berries are just as healthy and tasty. They are often picked at peak ripeness, so they pack a flavor punch. Yes, berry coconut popsicles are a healthy snack option. They contain natural sugars from fruits and honey or maple syrup. Coconut milk adds healthy fats, which are good for you. The fruits also provide vitamins and antioxidants. Enjoying these popsicles can be a great way to cool down while getting nutrients. Just be mindful of the added sweetener if you're watching sugar intake. For the full recipe, check out the details above. You learned how to make berry coconut popsicles step by step. We discussed the main ingredients, the blending process, and freezing methods. I shared tips to prevent ice crystals and improve flavor. You saw how to store popsicles and how to thaw them. Making these treats is simple and fun. Feel free to experiment with flavors. Enjoy the sweet, refreshing taste of homemade popsicles!](https://juliesdish.com/wp-content/uploads/2025/05/9bf12b94-88d0-4fc0-a884-7a705e288e20-768x768.webp)
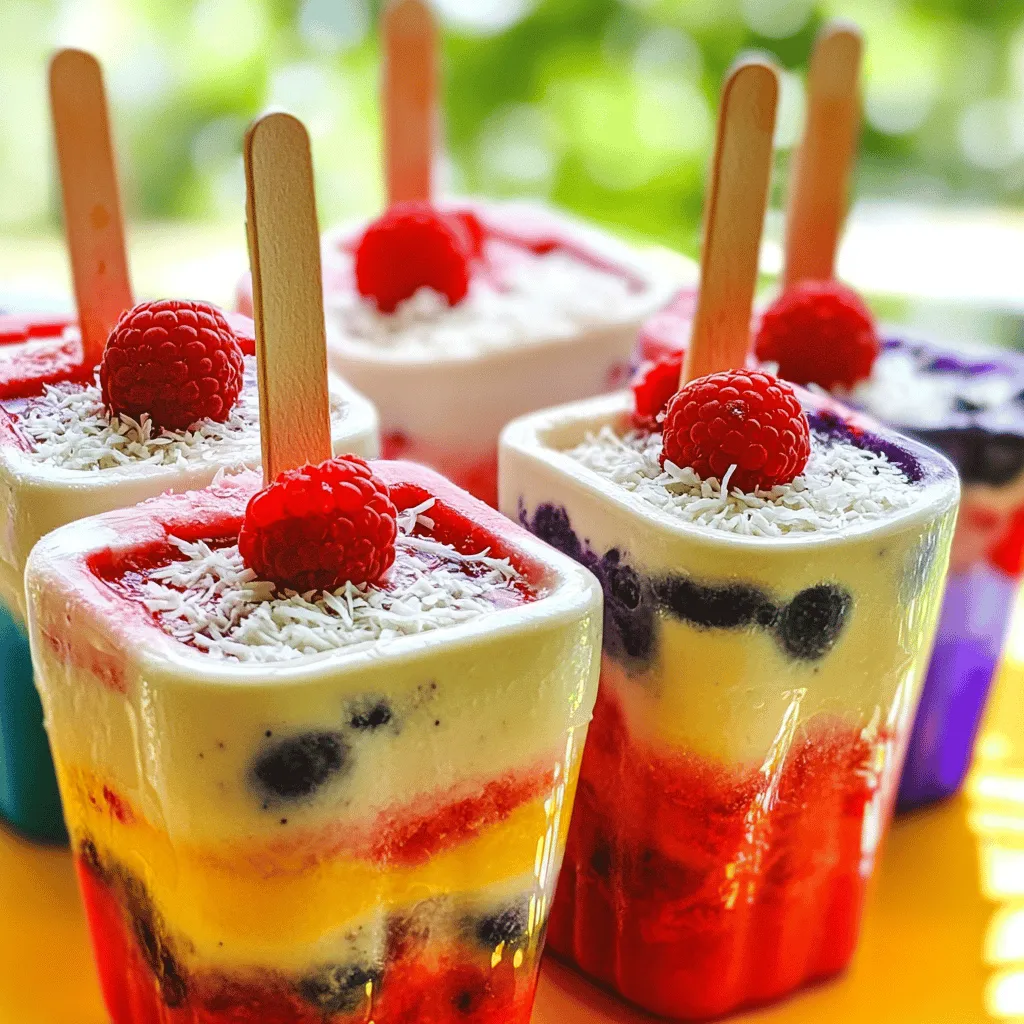
Looking for a cool, tasty treat? You’ve found it! These Berry Coconut Popsicles are not only easy to make, but they also burst with flavor. With fresh berries and creamy coconut milk, they’re perfect for hot days or any time you crave a sweet escape. Join me as I share my simple steps and helpful tips to create these refreshing popsicles your whole family will love!
Ingredients
To make Berry Coconut Popsicles, you need some fresh and simple ingredients. Here’s what you will need:
– 1 cup mixed berries (strawberries, blueberries, raspberries)
– 1 cup coconut milk (canned or carton, unsweetened)
– 2 tablespoons honey or maple syrup
– 1/2 teaspoon vanilla extract
– 1/4 cup finely shredded coconut (unsweetened)
– A pinch of sea salt
These ingredients come together to create a refreshing treat. The berries add a fruity flavor, while the coconut milk gives it a creamy base. The honey or maple syrup sweetens the popsicles just right. You can also customize the sweetness to fit your taste.
Using unsweetened coconut milk helps keep the flavors bright. The vanilla extract adds warmth, and the sea salt enhances all the tastes. Don’t forget the shredded coconut! It adds a fun texture and makes each bite special.Enjoy gathering these ingredients!
Step-by-Step Instructions
Preparing the Berry Mixture
First, gather your ingredients. In a blender, add the mixed berries and coconut milk. Blend them until the mix is smooth and creamy. Next, add honey or maple syrup for sweetness. Don’t forget the vanilla extract! Blend again until well mixed.
Texture and Folding
Now, it’s time to taste the mixture. If it needs more sweetness, add a bit more honey or syrup. If you want some berry chunks, hold back a few berries. In a bowl, fold in the finely shredded coconut and any reserved berries for extra texture.
Filling the Molds
Carefully pour the berry coconut mixture into your popsicle molds. Leave a little space at the top. This space lets the popsicles expand as they freeze. Insert the popsicle sticks. Tap the molds lightly on the counter to get rid of any air bubbles.
Freezing Process
Freeze the popsicles for at least 4 to 6 hours. They need to be completely solid to hold their shape. To take them out, run warm water over the outside of the molds for a few seconds. This trick helps the pops come out easily. Enjoy your refreshing treats!
Tips & Tricks
Achieving Perfect Popsicles
To avoid ice crystals, blend your mixture well. A smooth blend keeps the popsicles creamy. If you notice ice crystals forming, try adding more coconut milk. This helps create a silkier texture.
For better flavor combinations, mix different berries. Strawberries and blueberries pair nicely. You can also add a splash of lime juice for a fresh twist. Experiment and find your favorite blend!
Equipment Recommendations
For the best molds, choose silicone ones. They make it easy to pop out the popsicles. Look for molds that hold at least 3 ounces. This size is perfect for snacking.
For blending, I recommend a high-powered blender. It should easily mix fruits and coconut milk. A smooth mixture is key for creamy popsicles. If you have a personal blender, that works great too!
Variations
Flavor Combinations
You can change the taste of your berry coconut popsicles easily. Adding pineapple gives a tropical twist. The sweet and tart flavor of pineapple pairs well with berries. You could blend in a cup of fresh pineapple chunks. Then, follow the instructions for a refreshing treat.
Adding citrus like lime or lemon brings a zing. This brightens up the flavors and adds a fun kick. Just squeeze in some fresh juice or add zest. A little goes a long way, so start with a teaspoon. Adjust to your taste for a perfect balance.
Dietary Adjustments
Making berry coconut popsicles fit your diet is simple. If you prefer vegan options, you can swap honey for maple syrup. Both sweeteners work well in this recipe. They add sweetness without losing flavor.
For a low-sugar version, you can use stevia or monk fruit. These sweeteners offer a great taste with fewer calories. Adjust the amount to fit your liking. You can enjoy these treats without the extra sugar.
Storage Info
How to Store Popsicles
Store your berry coconut popsicles in an airtight container. This keeps them fresh and tasty. Wrap each popsicle in plastic wrap for extra protection. Place them in the freezer at 0°F (-18°C) for best results. They can last up to two months in the freezer.
Thawing Tips
To enjoy your popsicles, you need to thaw them a bit. The best way is to let them sit at room temperature for 5-10 minutes. You can also run warm water over the molds for a quick release. This method works great without melting them too much.
FAQs
What are Berry Coconut Popsicles?
Berry coconut popsicles are a fun and tasty treat. They have a creamy texture from coconut milk. The mix of berries adds a burst of sweet and tangy flavor. You can taste strawberries, blueberries, and raspberries in each bite. The shredded coconut gives a nice chewiness, making every lick a delight. These popsicles are perfect on hot days or for a quick snack.
How long do Berry Coconut Popsicles last in the freezer?
Berry coconut popsicles can last up to two months in the freezer. They stay tasty and creamy if you keep them sealed well. Use an airtight container or wrap them tightly. After two months, they may lose some flavor or texture. Always check for ice crystals before enjoying them.
Can I use frozen berries?
Yes, you can use frozen berries for these popsicles. They make a great option if fresh berries aren’t available. Just be sure to let them thaw a bit before blending. This helps achieve a smooth texture. Frozen berries are just as healthy and tasty. They are often picked at peak ripeness, so they pack a flavor punch.
Are these popsicles healthy?
Yes, berry coconut popsicles are a healthy snack option. They contain natural sugars from fruits and honey or maple syrup. Coconut milk adds healthy fats, which are good for you. The fruits also provide vitamins and antioxidants. Enjoying these popsicles can be a great way to cool down while getting nutrients. Just be mindful of the added sweetener if you’re watching sugar intake.
You learned how to make berry coconut popsicles step by step. We discussed the main ingredients, the blending process, and freezing methods. I shared tips to prevent ice crystals and improve flavor. You saw how to store popsicles and how to thaw them.
Making these treats is simple and fun. Feel free to experiment with flavors. Enjoy the sweet, refreshing taste of homemade popsicles!
![To make Berry Coconut Popsicles, you need some fresh and simple ingredients. Here’s what you will need: - 1 cup mixed berries (strawberries, blueberries, raspberries) - 1 cup coconut milk (canned or carton, unsweetened) - 2 tablespoons honey or maple syrup - 1/2 teaspoon vanilla extract - 1/4 cup finely shredded coconut (unsweetened) - A pinch of sea salt These ingredients come together to create a refreshing treat. The berries add a fruity flavor, while the coconut milk gives it a creamy base. The honey or maple syrup sweetens the popsicles just right. You can also customize the sweetness to fit your taste. Using unsweetened coconut milk helps keep the flavors bright. The vanilla extract adds warmth, and the sea salt enhances all the tastes. Don't forget the shredded coconut! It adds a fun texture and makes each bite special. For the full recipe, you can follow the detailed steps ahead. Enjoy gathering these ingredients! First, gather your ingredients. In a blender, add the mixed berries and coconut milk. Blend them until the mix is smooth and creamy. Next, add honey or maple syrup for sweetness. Don't forget the vanilla extract! Blend again until well mixed. Now, it's time to taste the mixture. If it needs more sweetness, add a bit more honey or syrup. If you want some berry chunks, hold back a few berries. In a bowl, fold in the finely shredded coconut and any reserved berries for extra texture. Carefully pour the berry coconut mixture into your popsicle molds. Leave a little space at the top. This space lets the popsicles expand as they freeze. Insert the popsicle sticks. Tap the molds lightly on the counter to get rid of any air bubbles. Freeze the popsicles for at least 4 to 6 hours. They need to be completely solid to hold their shape. To take them out, run warm water over the outside of the molds for a few seconds. This trick helps the pops come out easily. Enjoy your refreshing treats! For the complete process, check the [Full Recipe]. To avoid ice crystals, blend your mixture well. A smooth blend keeps the popsicles creamy. If you notice ice crystals forming, try adding more coconut milk. This helps create a silkier texture. For better flavor combinations, mix different berries. Strawberries and blueberries pair nicely. You can also add a splash of lime juice for a fresh twist. Experiment and find your favorite blend! For the best molds, choose silicone ones. They make it easy to pop out the popsicles. Look for molds that hold at least 3 ounces. This size is perfect for snacking. For blending, I recommend a high-powered blender. It should easily mix fruits and coconut milk. A smooth mixture is key for creamy popsicles. If you have a personal blender, that works great too! {{image_2}} You can change the taste of your berry coconut popsicles easily. Adding pineapple gives a tropical twist. The sweet and tart flavor of pineapple pairs well with berries. You could blend in a cup of fresh pineapple chunks. Then, follow the instructions for a refreshing treat. Adding citrus like lime or lemon brings a zing. This brightens up the flavors and adds a fun kick. Just squeeze in some fresh juice or add zest. A little goes a long way, so start with a teaspoon. Adjust to your taste for a perfect balance. Making berry coconut popsicles fit your diet is simple. If you prefer vegan options, you can swap honey for maple syrup. Both sweeteners work well in this recipe. They add sweetness without losing flavor. For a low-sugar version, you can use stevia or monk fruit. These sweeteners offer a great taste with fewer calories. Adjust the amount to fit your liking. You can enjoy these treats without the extra sugar. Explore the [Full Recipe] to see how these changes fit in! Store your berry coconut popsicles in an airtight container. This keeps them fresh and tasty. Wrap each popsicle in plastic wrap for extra protection. Place them in the freezer at 0°F (-18°C) for best results. They can last up to two months in the freezer. To enjoy your popsicles, you need to thaw them a bit. The best way is to let them sit at room temperature for 5-10 minutes. You can also run warm water over the molds for a quick release. This method works great without melting them too much. Berry coconut popsicles are a fun and tasty treat. They have a creamy texture from coconut milk. The mix of berries adds a burst of sweet and tangy flavor. You can taste strawberries, blueberries, and raspberries in each bite. The shredded coconut gives a nice chewiness, making every lick a delight. These popsicles are perfect on hot days or for a quick snack. Berry coconut popsicles can last up to two months in the freezer. They stay tasty and creamy if you keep them sealed well. Use an airtight container or wrap them tightly. After two months, they may lose some flavor or texture. Always check for ice crystals before enjoying them. Yes, you can use frozen berries for these popsicles. They make a great option if fresh berries aren't available. Just be sure to let them thaw a bit before blending. This helps achieve a smooth texture. Frozen berries are just as healthy and tasty. They are often picked at peak ripeness, so they pack a flavor punch. Yes, berry coconut popsicles are a healthy snack option. They contain natural sugars from fruits and honey or maple syrup. Coconut milk adds healthy fats, which are good for you. The fruits also provide vitamins and antioxidants. Enjoying these popsicles can be a great way to cool down while getting nutrients. Just be mindful of the added sweetener if you're watching sugar intake. For the full recipe, check out the details above. You learned how to make berry coconut popsicles step by step. We discussed the main ingredients, the blending process, and freezing methods. I shared tips to prevent ice crystals and improve flavor. You saw how to store popsicles and how to thaw them. Making these treats is simple and fun. Feel free to experiment with flavors. Enjoy the sweet, refreshing taste of homemade popsicles!](https://juliesdish.com/wp-content/uploads/2025/05/9bf12b94-88d0-4fc0-a884-7a705e288e20-250x250.webp)
